<!DOCTYPE html>
<html>
<head>
<meta charset="utf-8">
<title>Dom Tree</title>
</head>
<body>
<!-- DOM : HTML문서의 요소들을 객체로서 모델링하여 도식화 한 것 -->
<!-- DOM tree의 구성요소를 node라고 부름 -->
<!-- node의 종류는 3 종류: element node, attribute node, text node -->
<!-- node간의 관계 [ 부모,자식, 형제]의 관계를 이용하여 요소들 제어 -->
<!-- 자주 안쓰임 -->
<!-- dom노드의 동적인 생성 및 추가와 삭제 -->
<button onclick="aaa()">add Text node</button>
<button onclick="bbb()">add Element node</button>
<button onclick="ccc()">remove child node</button>
<p></p>
<!-- 스크립트 작성 영역 : 내부스크립트-->
<script>
function aaa(){
//텍스트노드 생성
var node= document.createTextNode("This is text");
var node= document.createTextNode("<a href=''>this is text</a>");
//텍스트노드를 자식노드로 가질 요소를 찾아오기
var e=document.getElementsByTagName('p')[0];
e.appendChild(node);
//간편하게 textnode를 추가하는 방법
e.textContent="<a href=''>this is text</a>";
} //p는 단락이라 글씨추가 복잡
function bbb(){
//요소노드 만들기
var node=document.createElement('a');
//anchor요소에 설정할 속성노드를 생성
var attr=document.createAttribute('href');
//요소에 속성을 추가하기
node.setAttributeNode(attr);
//텍스트노드 만들어 추가
var text=document.createTextNode('Google');
node.append(text);
//만든요소를 p요소의 자식으로 추가하기
var e=document.getElementsByTagName('p')[0];
e.appendChild(node);
//요소추가를 간편하게 적용하기****************
}
function ccc(){
var e=document.getElementsByTagName('p')[0];
e.removeChild(e.firstChild);
}
</script>
<hr>
<!-- 요소를 제어할 때 DOM구조를 이용해 보기 -->
<!-- 1. 기존에 사용하던 ID를 이용하여 요소제어하기 -->
<img src="./image/pome.png" alt="pome" width="120" height="100" id="aa">
<button onclick="changeImage()">change image</button>
<script>
function changeImage(){
var img= document.getElementById('aa');
img.src="./image/poodle.png";
}
</script>
<!-- 2. DOM구조를 이용하여 요소제어하기 -->
<p>this is paragraph</p>
<button onclick="changeStyle(this)">스타일 변경</button>
<script>
function changeStyle(e){
//태그이름 잘 안씀.
//클릭된 버튼의 앞 형제요소 찾아오기
var p=e.previousElementSibling;
p.style.color="red";
p.style.fontWeight="bold";
p.style.fontStyle="italics";
}
</script>
<hr>
<!-- 스타일을 변경하는 다른 방법(실무에서 많이 사용) -->
<style>
.kk{
color: blue;
font-weight: bold;
font-style: italic;
font-family: 'Times New Roman', Times, serif;
}
.ss{
font-size: 2em;
}
</style>
<p id="p1" class="ss">스타일 테스트</p>
<button onclick="change()">change styles</button>
<script>
function change(){
var p=document.getElementById('p1');
p.className += " kk";
}
</script>
<hr>
<!-- 새로운 요소 검색 문법 -->
<h3 id="hh">aaaa</h3>
<button onclick="ggg()">글씨 변경</button>
<script>
function ggg(){
//CSS의 선택자를 이용하여 요소 선택하는 기능 추가되었음
var h = document.querySelector('#hh');
h.innerHTML="hello world";
}
</script>
<hr>
<ul class="tt">
<li>aaa</li>
<li>bbb</li>
<li>ccc</li>
</ul>
<button onclick="fff()">button</button>
<script>
function fff(){
var es= document.querySelectorAll('ul.tt li');
for(var i=0; i<es.length; i++){
es[i].style.color="green";
}
}
</script>
</body>
</html>

<!DOCTYPE html>
<html>
<head>
<meta charset="utf-8">
<title>BOM</title>
</head>
<body>
<!-- BOM : 웹브라우저에 대한 객체 모델링 -->
<!-- 1. window [최상위객체] -->
<!-- 주요기능 메소드들 -->
<!-- 1.1 open, close : 새로운 웹문서를 열기/닫기 -->
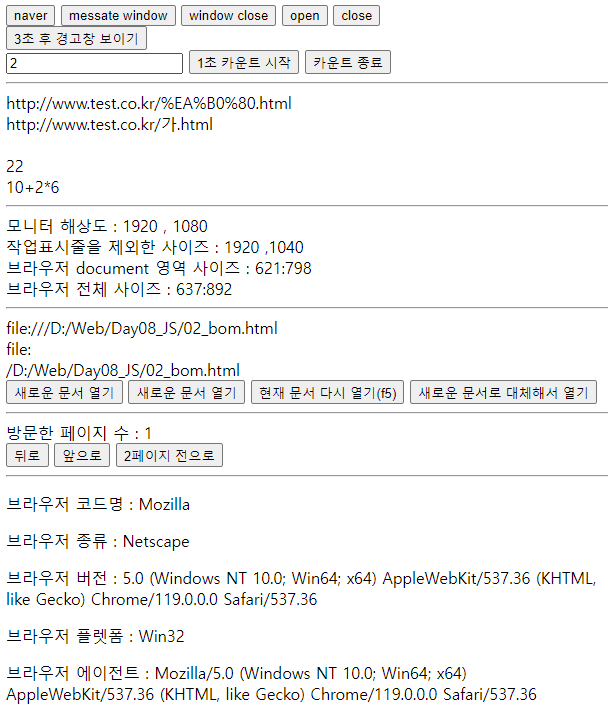
<button onclick="aaa()">naver</button>
<script>
function aaa(){
// window.open('http://www.naver.com'); //taget의 default값 "_blank"
// window.open('http://www.naver.com',"_self");
//추가 옵션
}
</script>
<!-- 빈 윈도우 띄우기 -->
<button onclick="bbb()">messate window</button>
<script>
function bbb(){
var win=window.open("","","width=500, height=200, left=200, top=150");
win.document.write("<h4>hello message</h4>");
win.document.write("<p>This window is message window</p>")
}
</script>
<button onclick="ccc()">window close</button>
<script>
function ccc(){
window.close(); //브라우저가 버전업이 되면서 본체 윈도우는 종료가 안됨.
}
</script>
<!-- open으로 연 창을 닫을 수 있음 -->
<button onclick="ddd()">open</button>
<button onclick="eee()">close</button>
<script>
var w;
function ddd(){
w=open('','','width=100, height=50');
w.document.write("nice to meet you");
}
function eee(){
w.close();
}
</script>
<br>
<!-- 일정시간 후 특정 동작 수행. 또는 반복 수행 -->
<button onclick="ggg()">3초 후 경고창 보이기</button>
<script>
function ggg(){
setTimeout( function(){
alert('3초 경과');
} , 3000);
}
</script>
<br>
<input type="text" id="in1" value="0">
<button onclick="start()">1초 카운트 시작</button>
<button onclick="stop()">카운트 종료</button>
<script>
var show= function(){
var e = document.getElementById('in1');
e.value=parseInt(e.value)+1;
}
var a;
function start(){
a=setInterval(show,1000);
}
function stop(){
clearInterval(a);
}
</script>
<hr>
<!-- 인코딩 함수: 주소 url의 특수문자를 base64문자로 변환해주는 기능 -->
<script>
//인코딩 함수는 여러개.. 그중 가장 많이 사용되는 것만 소개
document.write(url+"<br>")
//디코딩 함수로.. 원래글씨 얻어오기
var aa= decodeURI(url);
document.write(aa+"<br>");
document.write("<br>");
//eval() - 문자열을 JS코드로 해석해주는 기능메소드
var x=10+2*6;
document.write(x+"<br>");
var x="10+2*6";
document.write(x+"<br>");
var z= eval("10+2*6");
document.w(z+"<br>");
document.write("<br>");
//NaN [NOT A NUMBER]
document.write(10+undefined);
document.write(isNaN(10)+"<br>"); //false
document.write(isNaN('10')+"<br>"); //false--숫자로 변환이 가능한지를 검증.
document.write(isNaN('aaa')+"<br>"); //true
</script>
<!-- 2. document : 웹페이지를 관리하는 객체 원래는 window.document-->
<!-- 3. screen : 모니터 화면 사이즈 및 색상 정보-->
<hr>
<script>
document.write("모니터 해상도 : " + screen.width+" , " + screen.height +"<br>");
document.write("작업표시줄을 제외한 사이즈 : " + screen.availWidth+ " ," + screen.availHeight+"<br>")
//이 값을 이용하여 full screen 버튼 같은 기능도 구현가능
//혹시 웹 브라우저의 사이즈를 알고 싶다면? window객체에게 물어봐야 함 //스크린과 상관없음.
document.write("브라우저 document 영역 사이즈 : " + window.innerWidth+":" +window.innerHeight+"<br>")
document.write("브라우저 전체 사이즈 : " + window.outerWidth+":" +window.outerHeight+"<br>")
</script>
<hr>
<!-- 4. location : url 정보 관련 객체 -->
<script>
document.write(location.href+"<br>")
document.write(location.protocol+"<br>")
document.write(location.pathname+"<br>")
</script>
<button onclick="nnn()">새로운 문서 열기</button>
<script>
function nnn(){
}
</script>
<!-- 새 문서를 여는 방법에 대한 기능 메소드들 -->
<button onclick="assign()">새로운 문서 열기</button>
<button onclick="reload()">현재 문서 다시 열기(f5)</button>
<button onclick="replace()">새로운 문서로 대체해서 열기</button>
<script>
function assign(){
}
function reload(){
}
function replace(){
}
</script>
<hr>
<!-- 5. history : 방문한 페이지의 url관리 **많이쓰임-->
<script>
document.write("방문한 페이지 수 : " + history.length+"<br>")
</script>
<button onclick="back()">뒤로</button>
<button onclick="forward()">앞으로</button>
<button onclick="go()">2페이지 전으로</button>
<script>
function back(){
history.back();
}
function forward(){
history.forward();
}
function go(){
history.go(-2);
}
</script>
<hr>
<!-- 6. navigator :브라우저의 정보 관리 객체 -
추후 브라우저의 새로운 기능 API가 모두 이 객체의 하위 멤버로 추가됨.-->
<script>
document.write('<p>브라우저 코드명 : ' + navigator.appCodeName+"</p>");
document.write('<p>브라우저 종류 : ' + navigator.appName+"</p>");
document.write('<p>브라우저 버전 : ' + navigator.appVersion+"</p>");
document.write('<p>브라우저 플렛폼 : ' + navigator.platform+"</p>");
document.write('<p>브라우저 에이전트 : ' + navigator.userAgent+"</p>");
</script>
</body>
</html>
<!DOCTYPE html>
<html>
<head>
<meta charset="utf-8">
<title>event handling</title>
<!-- 내부 스크립트 -->
<script>
// body안에 있는 요소를 찾아서 글씨를 설정.
document.getElementById('aa').innerHTML="hello"; //처리 안됨. 아직 요소가 없어서!!
//그래서 body요소가 모두 로딩된 후 코드를 실행하도록..하기위해.. load이벤트 처리
function loaded(){
document.getElementById('aa').innerHTML="nice to meet you";
//이벤트에 반응하는 함수를 등록하는 방법 3가지
//1. HTML요소에 이벤트 속성으로 콜백(자동호출)함수를 지정<button onclick="">
//2. JS에서 요소를 찾아와서 이벤트 콜백멤버변수에 함수를 지정
document.getElementById('aa').onclick= function(){
document.getElementById('aa').innerHTML += " Clicked!";
}
//3. 요소에 특정 이벤트리스너를 추가하는 메소드를 이용.
document.getElementById('aa').addEventListener('dblclick',function(){
alert("double clicked!!");
});
}
</script>
</head>
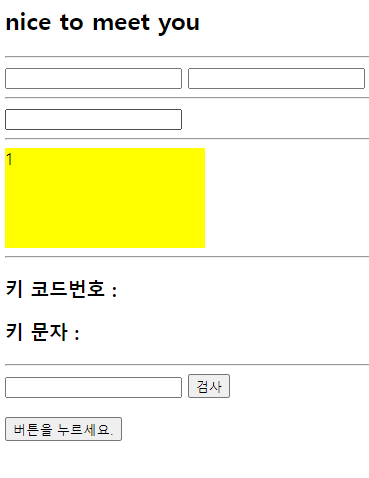
<body onload="loaded()" onkeypress="sss()">
<h2 id="aa"></h2>
<hr>
<!-- input요소의 입력필드 이벤트 ::주문자와 주소가 동일할 때 -->
<input type="text" id="in1" onfocus="aaa()">
<input type="text" id="in2" onblur="bbb()" onchange="ccc()">
<script>
function aaa(){
document.getElementById('in1').value="sam";
}
function bbb(){
alert('blur');
}
function ccc(){
alert('change');
}
</script>
<!-- 사용자의 입력 후 대문자로 자동 변환하는 곳에 활용 ::국민은행 아이디 대문자변경 -->
<hr>
<input type="text" id="in3" onchange="changUp()">
<script>
function changUp(){
var v=document.getElementById('in3').value;
document.getElementById('in3').value=v.toUpperCase();
}
</script>
<hr>
<!-- 마우스 관련 이벤트 -->
<div style="width: 200px; height: 100px; background-color: yellow;" onmouseover="over(this)" onmouseout="out(this)" onmousemove="move(this)" id="ddd"></div>
<script>
function over(e){
e.style.backgroundColor="lightgreen";
e.style.border="2px solid red";
}
function out(e){
e.style.backgroundColor="yellow";
e.style.border="";
}
var num=0;
function move(e){
num++;
e.innerHTML=num+"";
}
document.getElementById('ddd').onmousedown= function(){
document.getElementById('ddd').innerHTML = "mouse down!!";
}
document.getElementById('ddd').onmouseup= function(){
document.getElementById('ddd').innerHTML = "mouse up!!";
}
</script>
<hr>
<!-- 키보드 이벤트: body요소에 이벤트를 적용-->
<h3 id="h1">키 코드번호 : </h3>
<h3 id="h2">키 문자 : </h3>
<script>
function sss(){
var keycode=window.event.keyCode;
document.getElementById('h1').innerHTML = "키 코드번호: " + keycode;
document.getElementById('h2').innerHTML = "키 문자: " + String.fromCharCode(keycode);
}
</script>
<hr>
<!-- 유효성검사 -->
<input type="text" id="in5">
<button onclick="check()">검사</button>
<h3 id="h3"></h3>
<script>
function check(){
//검증용 정규표현식
var regExp= /^[a-zA-Z]+/; //(영문자 한개 이상)
var value= document.getElementById('in5').value;
//value에 대한 유효성 검사.
//방법1. String .match() 메소드
// if(value.match(regExp))alert('ok')
// else alert('요구하는 형식이 아닙니다.')
// //방법2. RegExp 객체의 test()메소드
// if(regExp.test(value)) alert('ok');
// else alert('요구하는 형식 아님')
//정규표현식에 대한 연습.
regExp= /a/; //a가 포함된 모든..
regExp= /A/; //A가 포함된 모든..
regExp= /ab/; //ab가 포함된 모든..
regExp= /^a/; //시작이 무조건 a..
regExp= /^[abc]/; //시작이 무조건 a or b or c..
regExp= /^[a-z]/; //시작이 무조건 영어소문자..
regExp= /^[a-zA-Z]/; //시작이 무조건 영어문자..
regExp= /a$/; //끝이 무조건 a....
regExp= /^a$/; //오직 a 1개
regExp= /^ab$/; //오직 ab 1개
regExp= /^[a-z]$/; //오직 영어소문자 1개
regExp= /^[a-zA-Z0-9]$/; //오직 영문자 OR 숫자 1개
regExp= /^[a-z]{2}$/; //영어소문자 2개
regExp= /^[a-z]{2,4}$/; //영어소문자 2~4개
regExp= /^[a-z]{4,}$/; //영어소문자 4개이상
regExp= /^\w{4,}$/; //문자나 숫자 4개이상
regExp= /^[a-z]*$/; //영어소문자 0개이거나 그 이상(없어도 된다.)
regExp= /^[a-z]+$/; //영어소문자 1개이거나 그 이상
regExp= /^[a-z]?$/; //영어소문자 1개이거나 0개(없어도 된다.)
regExp= /^[5-9]$/; //5~9 숫자 중 1개
regExp= /^\d$/; //숫자 1개
regExp= /^\d\d\d$/; //숫자 3개
regExp= /^\d{3,4}$/; //숫자 3~4개
regExp= /^\d\dk\d\dk\d$/; //숫자 2개 k 숫자2개 k 숫자2개
regExp=/^\d\d\d\d-\d\d-\d\d$/; //####-##-## 생년월일
regExp= /^[a-zA-Z0-9#%*!_]+@[a-zA-Z]+.[a-zA-Z]*$/ //####@##.## 이메일서식
regExp= /^http:/ //시작이 http: -url주소
regExp=/^\/$/ // '/' 1개를의미 (역슬래시는 이스케이프문자)
regExp=/^[/]$/ // '/' 얘도 됨.
var e= document.getElementById('h3');
if(regExp.test(value))e.innerHTML="ok";
else e.innerHTML="요구하는 형식이 아닙니다.";
}
</script>
<form name="myform">
<input type="submit" value="버튼을 누르세요." onclick="process()">
</form>
<script>
function process(){
alert("반갑습니다");
}
</script>
</body>
</html>